 Back
Back


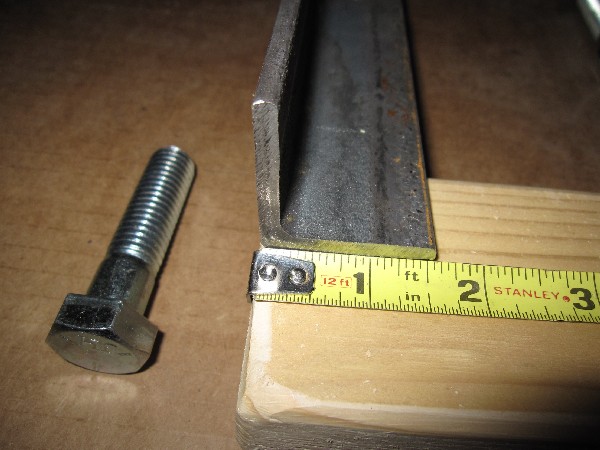
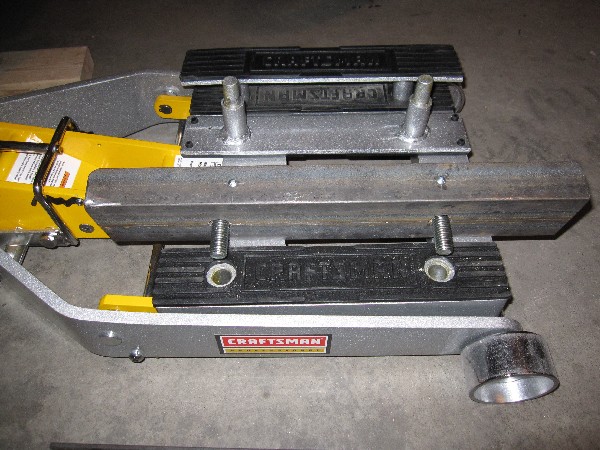
However from day 1 the problem was that the removable lift rails are only 12.5" wide which is not wide enough to SAFELY fit under most bike frames.
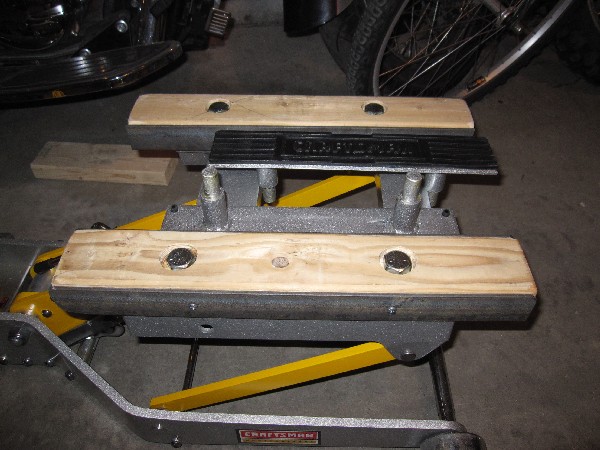
So this describes the 17" wide removable rails that I made with 1.5" steel angle iron, wooden 2x4's, and bolts.
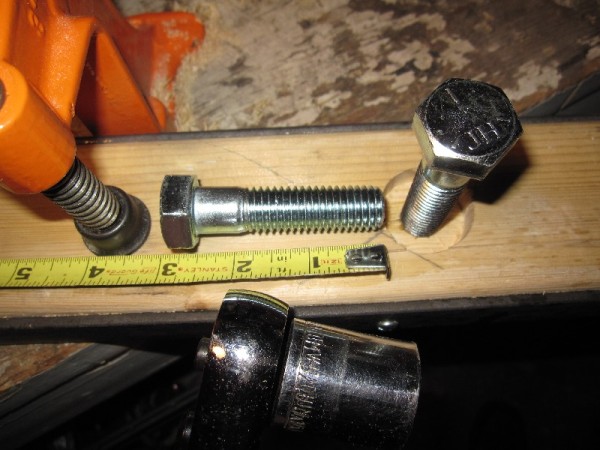
Materials needed: 68" total length (4 x 17") of 3/16" thick 1.5" wide steel angle iron, 34" total length (2 x 17") of 2x4 wood, 4 steel 5/8" bolts 2.5" long each. Also 4 pan head #10 wood screws 1.25" long each.
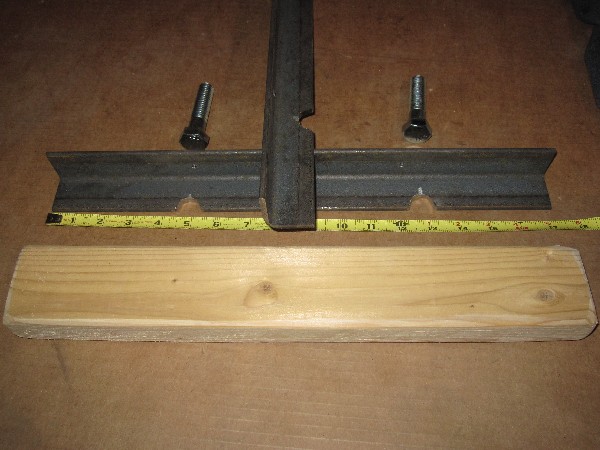
I had the steel company I bought the angle iron from pre-cut it into 4 pieces each 17" long, as it is some seriously thick metal to cut.
Everything below describes 1 rail so duplicate it for the 2nd one:
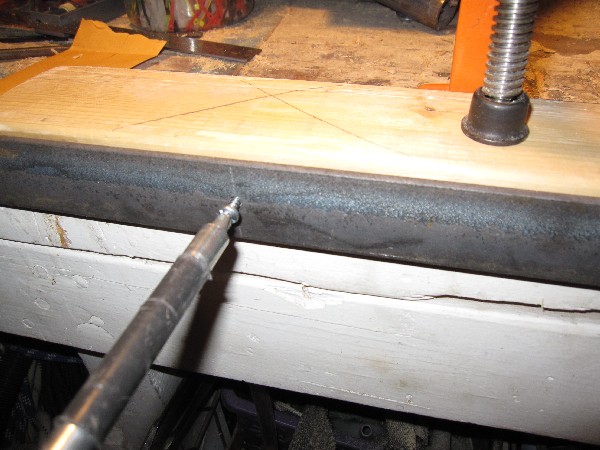
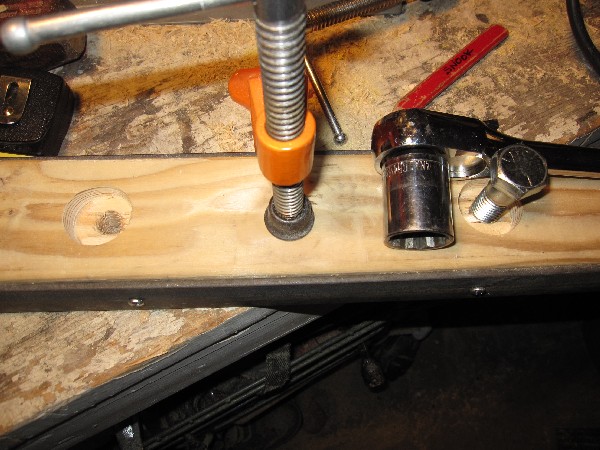
Then clamp the 2x4 wooden part downward against the angle iron pieces against a bench.
Install 2 of the #10 screws into each side to hold the wood onto the angle iron.

Turn the entire assembly over so the steel side is up, and drill 2 small pilot holes through the 2x4 positioned the exact distance apart to match the holes in the bike lift.
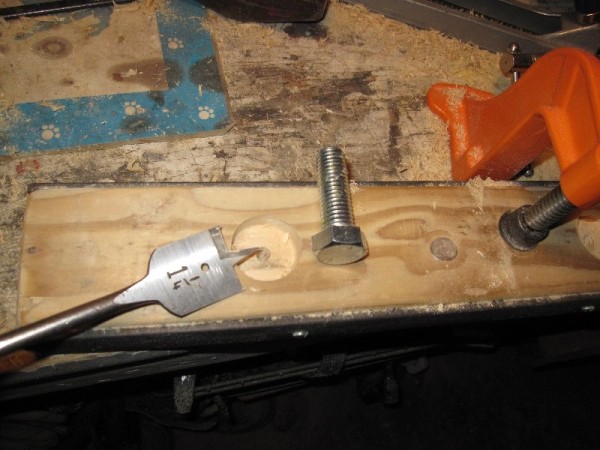
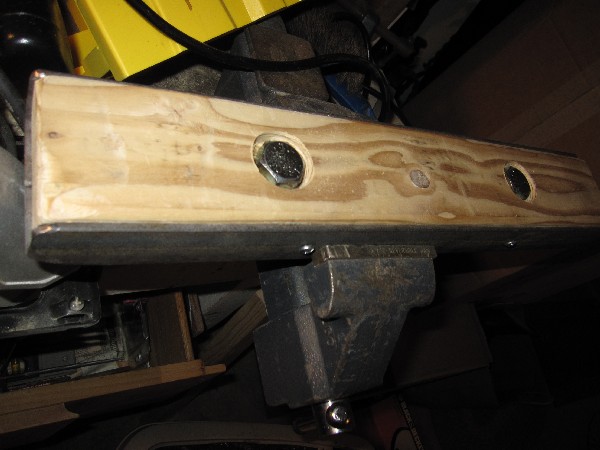
Then return the assembly so the 2x4 side is up, and use a 1.25" wood bit to drill down deep enough so the bolt head will be recessed below the top of the 2x4.
Mount it in a vise and then drill a 5/8" (or smaller) hole through the rest of the wood then insert the 5/8" bolt with a ratchet wrench (it should be snug) until the head is recessed below the top.
Try it out on the bike lift, then make the 2nd one.
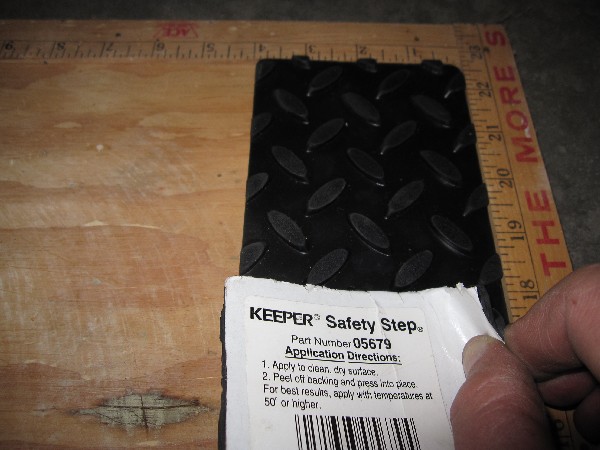
For a great finish, see if you can find 2 of these Keeper Safety Step #05679 heavy duty rubber tread strips that are 4"x17" each (only $4 each). Even though they have an adhesive strip, they don't stay on the wood when up against the forces of a bike on it, so I ended up putting a strong adhesive like Liquid Nails on them to hold them better.
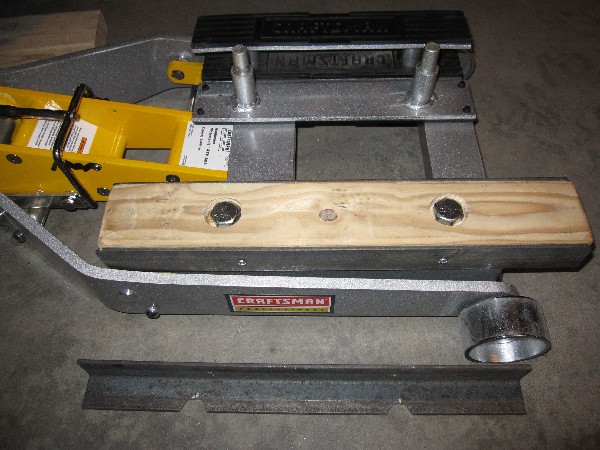
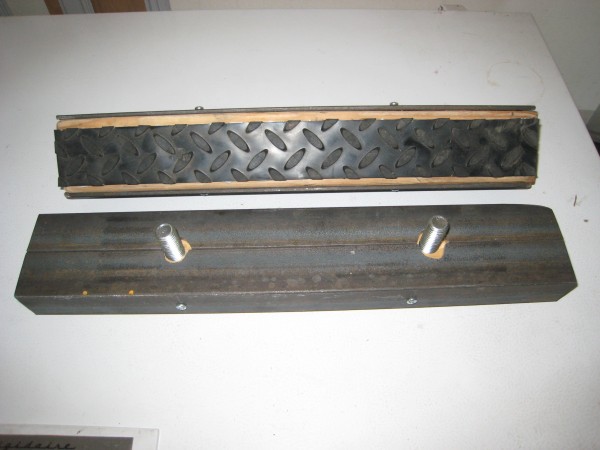
The finished rails!
Back